
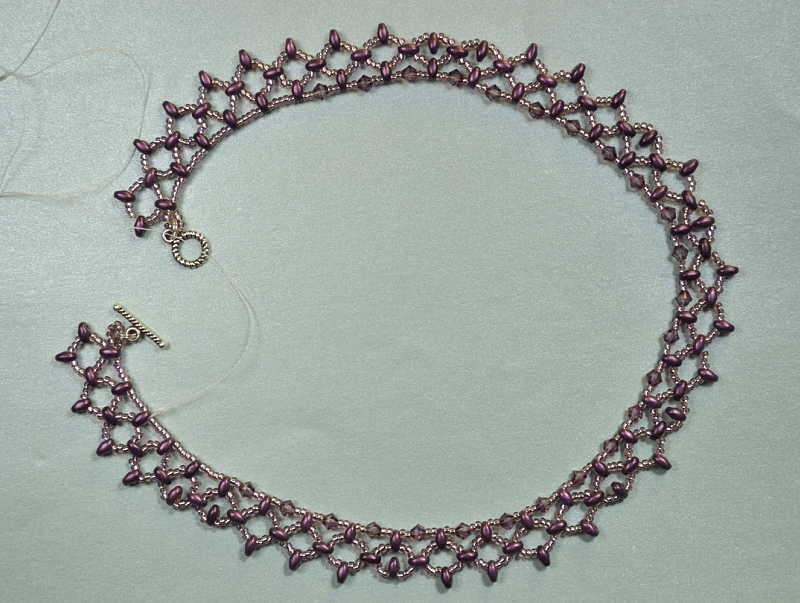
It all started with tila beads. I intended to make a matching bracelet to petrol-colored earrings I made in last tutorial. The problem was that it was one of those ideas that looks better in your head than in reality. I didn’t reject the idea but I made some changes. Tila beads became superduos, tubes became seedbeads and all of a sudden I had something totally different in my hands. The colors remind me of plums and a blooming tree. Spring is on its way to hearts of people.
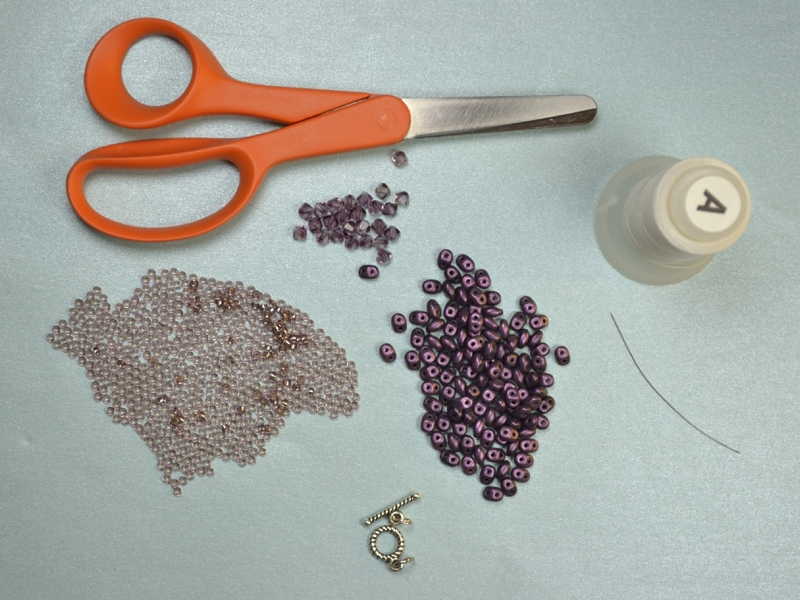
You’ll need
- a needle, thread and scissors
- seedbeads, size 11
- beads with double holes (Superduo or Twinbeads)
- 4 mm bicones
- a toggle clasp
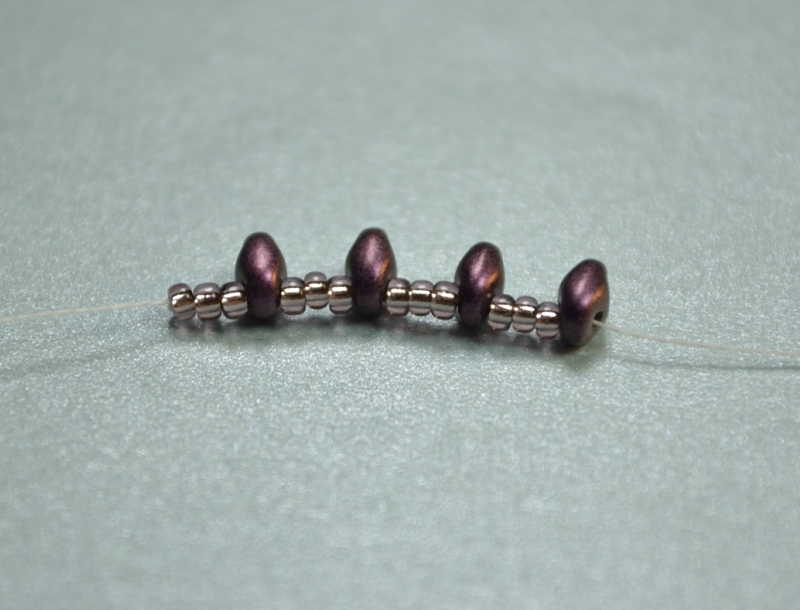
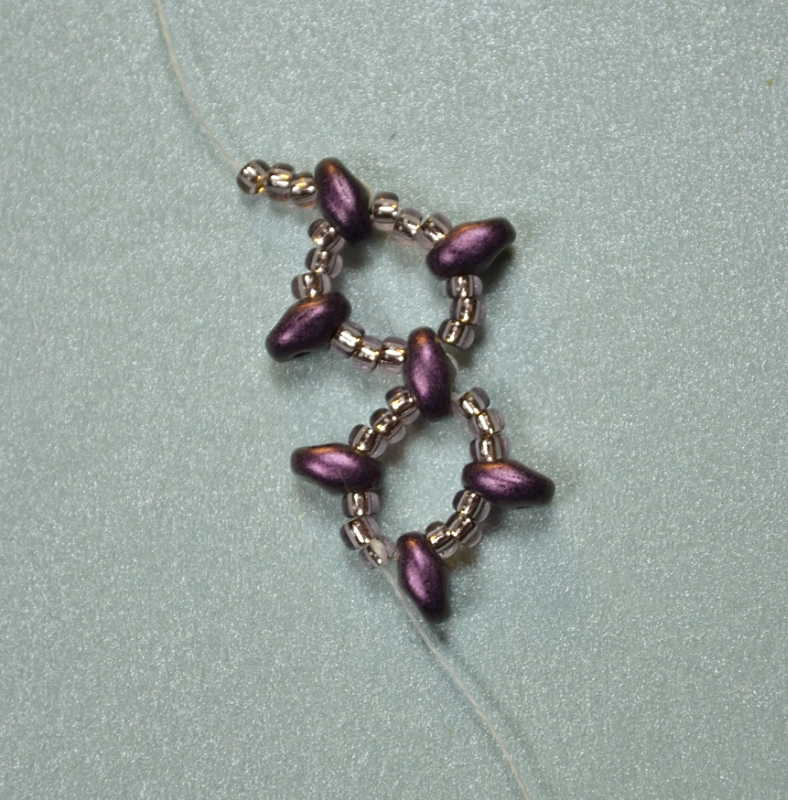
Take a thread, maximum a yard of length. This necklace is made of circles connected together. For the first circle you need 12 seedbeads and 4 superduos in a way shown in the picture. There’s a stopper bead on the left. Every time you place a superduo on the thread make sure its both holes are open. There are always some bad apples in a batch.

Go through all of the beads couple of times on tighten the thread to make a circle. The red dot in these images signs for the tail, the other one is the one you continue to work with.
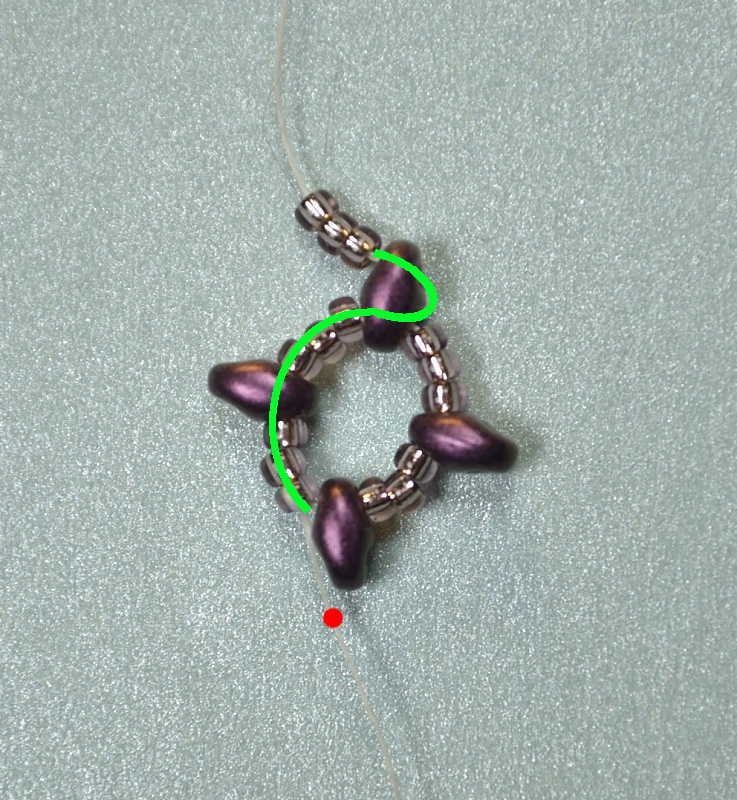
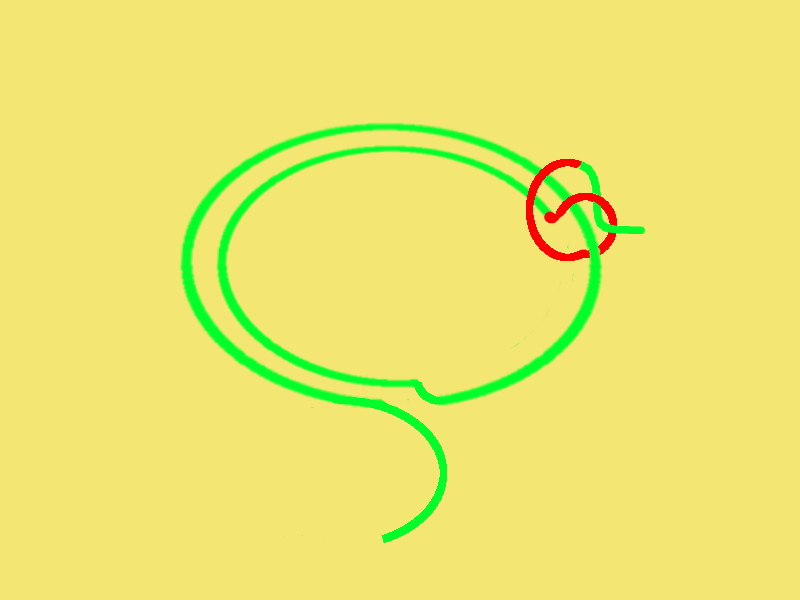
As soon as you have finished the first round, you may move on to next one. Pick the superduo opposite to the tail as a starting point. Go to it, make a U-turn as shown here.
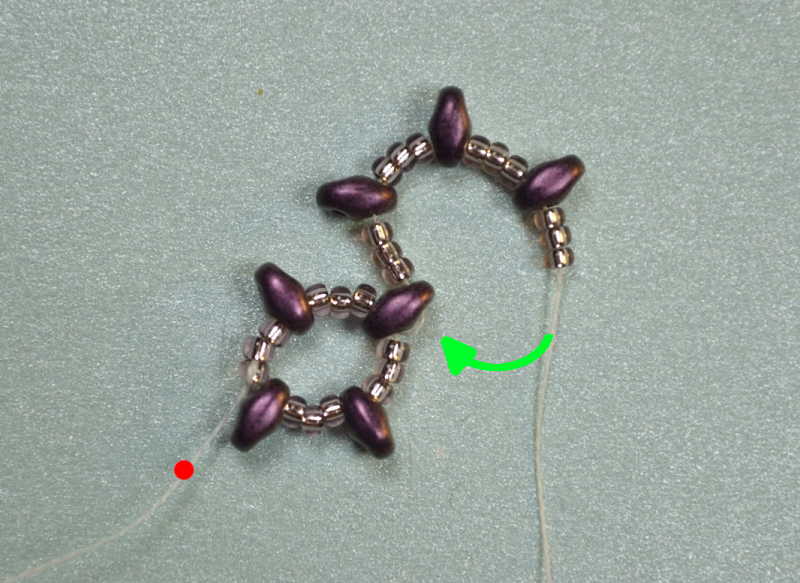
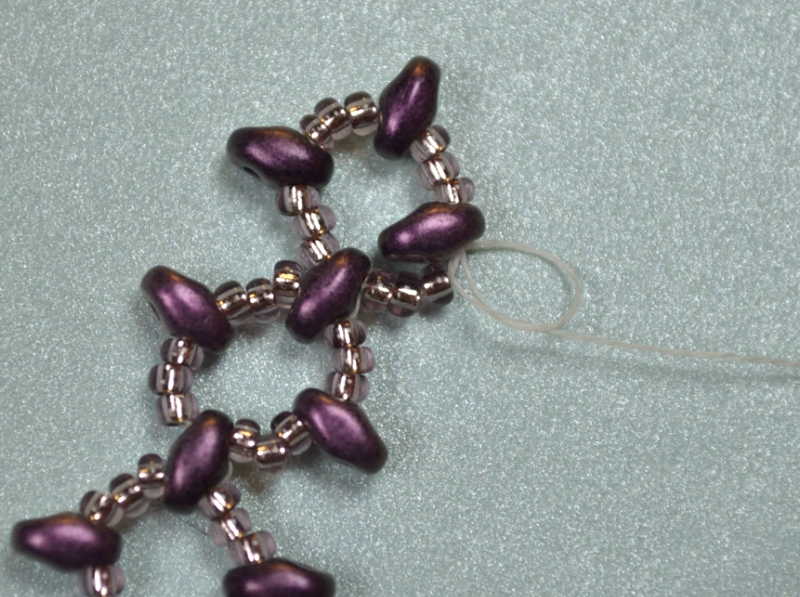
Round and round we go one after another. Needle goes always a full circle and half a circle more like in RAW.
The third round goes just like the second one. Pick the superduo opposite to your starting point and make a U-turn. Go on making these circles until you get your ideal length + 2 inches. For example, if you want to make a necklace that is 16 inches long, make it 18 inches. It will shrink in the second phase.
When making a necklace, you’re bound to run out of thread. A neat way to end a thread is to make a simple or double knot so that the thread you’re currently working with goes round the thread alreaady in place. When you have made 2-3 knots in different parts of the circle, keep on going around until it gets a bit difficult to go through seedbead holes. Then your thread is fixed in its place and you can cut the rest.

Start a new thread behind three circles like this. A few turns and it will be firmly on its place without sliding. This applies to practically all beading.

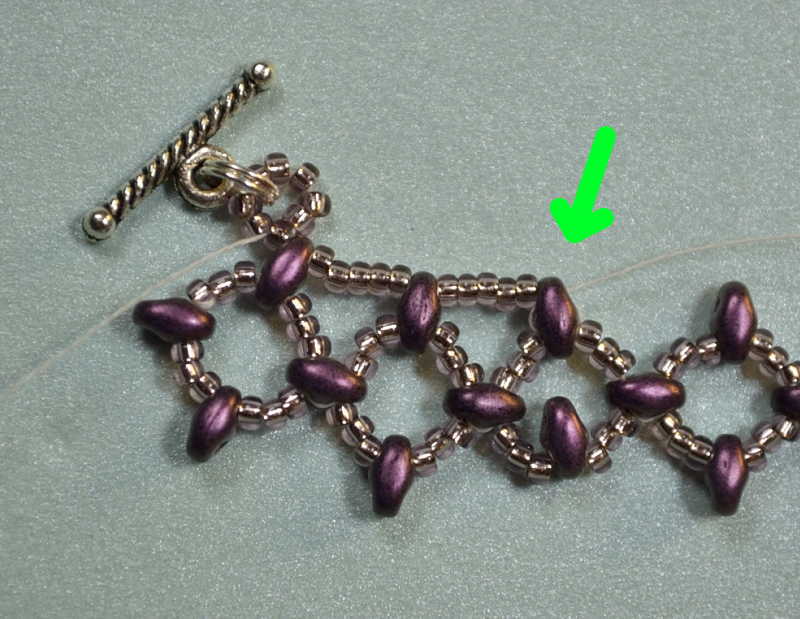
Now you’ve made your 18 inches of circles, it’s time to start the second phase. First we make a loop for the toggle clasp. Double jump rings are practical here because there’s no way for the jumpring to slip away through tiny cracks.
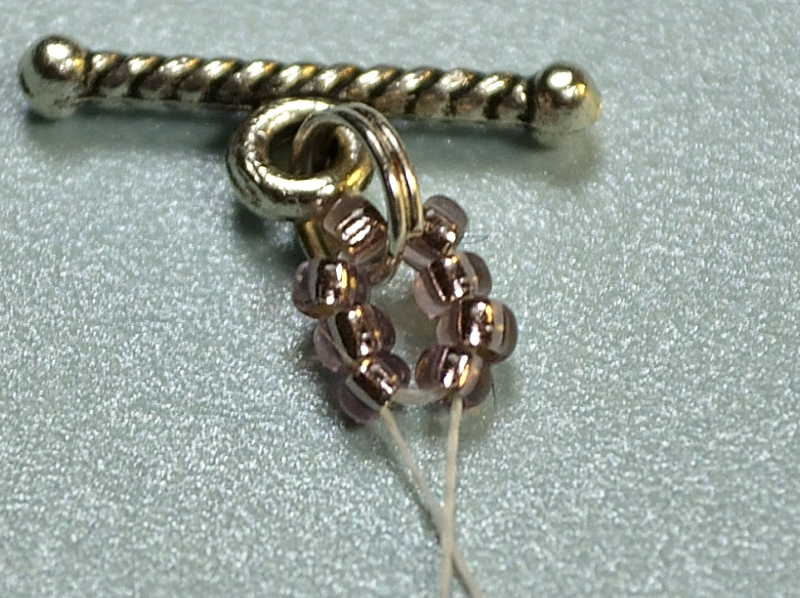
Like necklace like clasp. In a delicate piece like this you must have a small and delicate clasp that won’t clash with the style. Make a loop and tighten, go round the circle 3-4 times.

Here’s an easy part. Simply take the thread through the upper hole of the twinbeads. You can regulate the curvature by adding 5 or 6 seedbeads. 5 is for curved line, 6 is for straight line. The place of the clasp at the end up the upper row, no lower. This is because we always grab jewelry by their clasps and placing the clasp here prevents the necklace from twisting around itself in your hands.
It may seem difficult to keep it tight but here’s a tip. Go through both holes of a superduo, make sometimes a round back to where you were and tighten. That should do it.
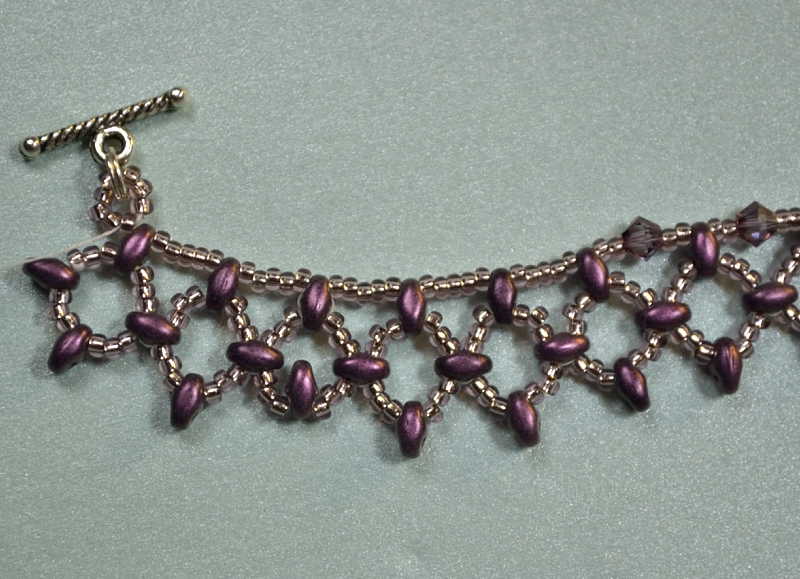
Finally, the bicones come along. Their role is to add sparkle and festivity. They are not essential to the structure like seedbeads and superduos so it’s possible to leave them out if you like. One 4 mm bicone equals two seedbeads.
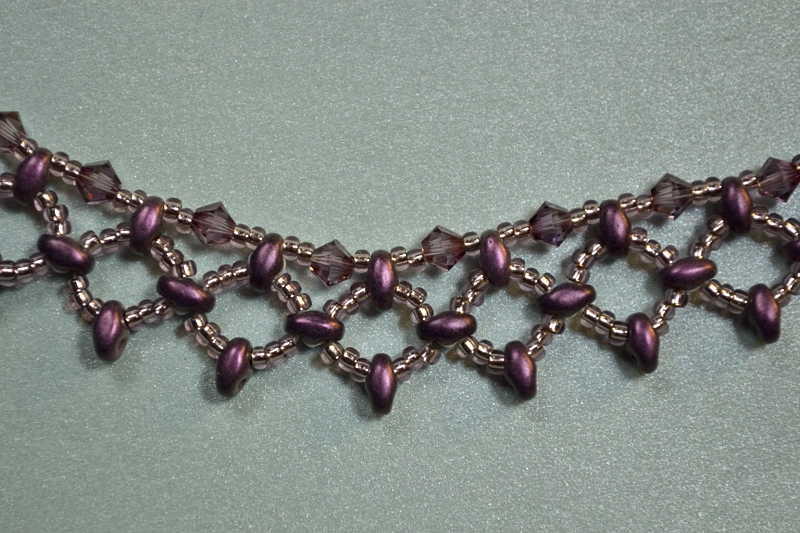
The rule ”one bicone = two seedbeads” in practise. When you need to curve the piece, the right amount of beads is one bicone and THREE seedbeads. If you want to keep it straight, you’ll add one bicone and FOUR seedbeads.
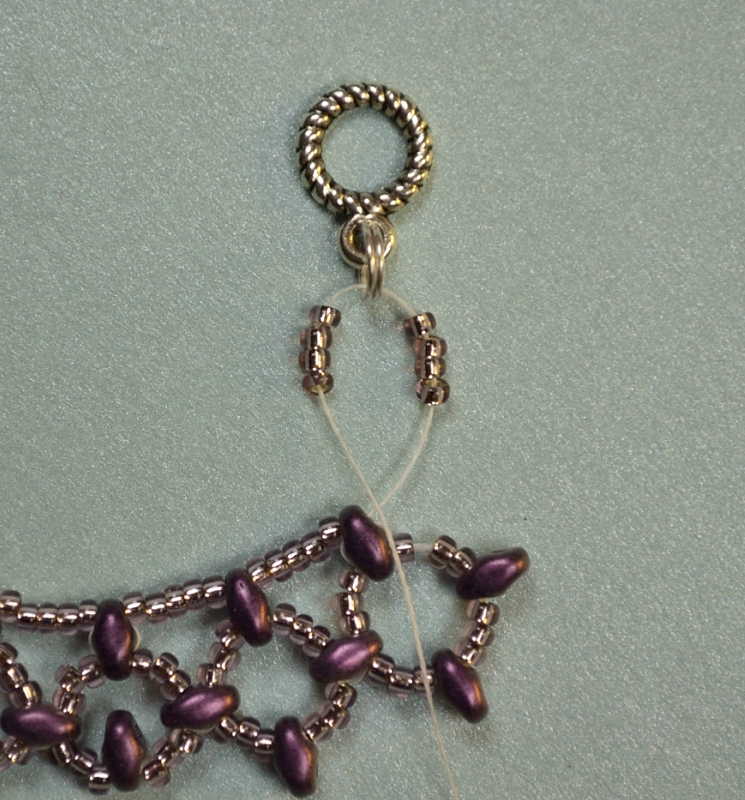
The latter end goes just like the first one. Make a loop of beads around a double jump ring.
Almost there, just some loose threads to end and you’re done! Go out and enjoy the spring. It’s only two months until the snow is gone.