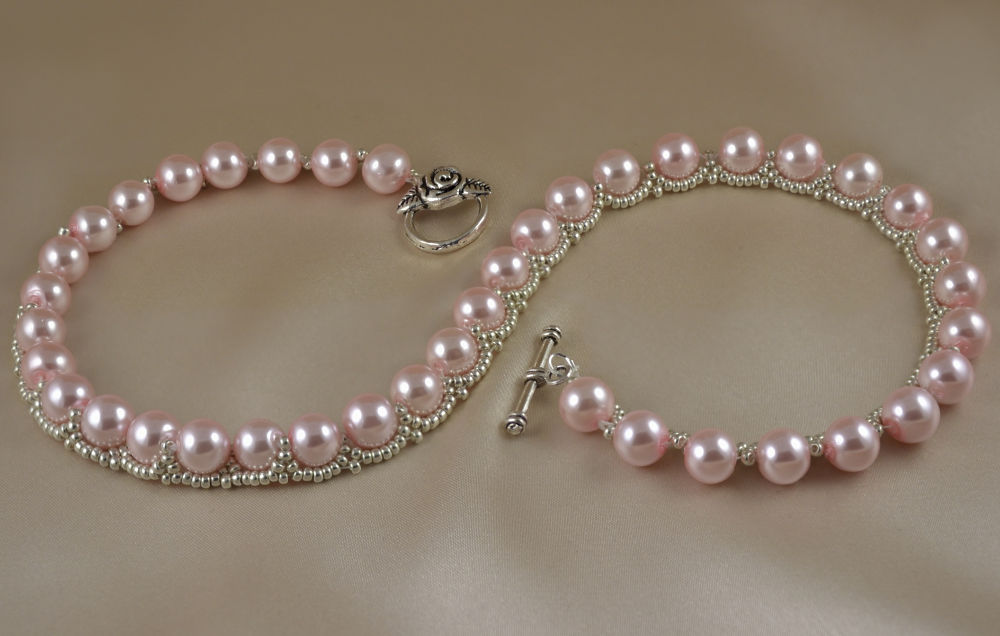
My latest design is a pink and girly lace dream that is at its best on a lady. In the previous article I told you a story about how I got the idea to this necklace.
You’ll need
Beadthread and a needle
Silver-colored seed beads size 11/o
8 mm beads (in this tutorial I call them big beads)
Toggle clasp
Two horseshoes
Scissors
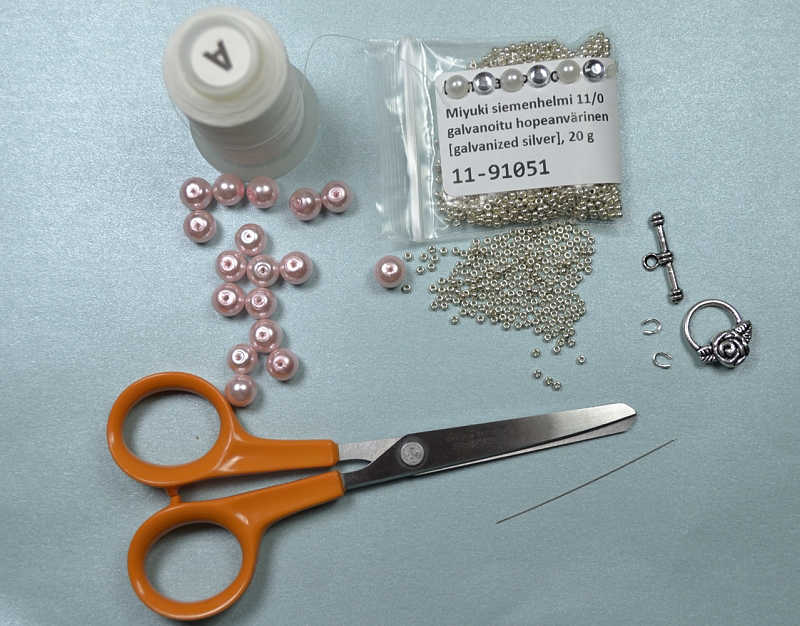
Picture 1: Supplies
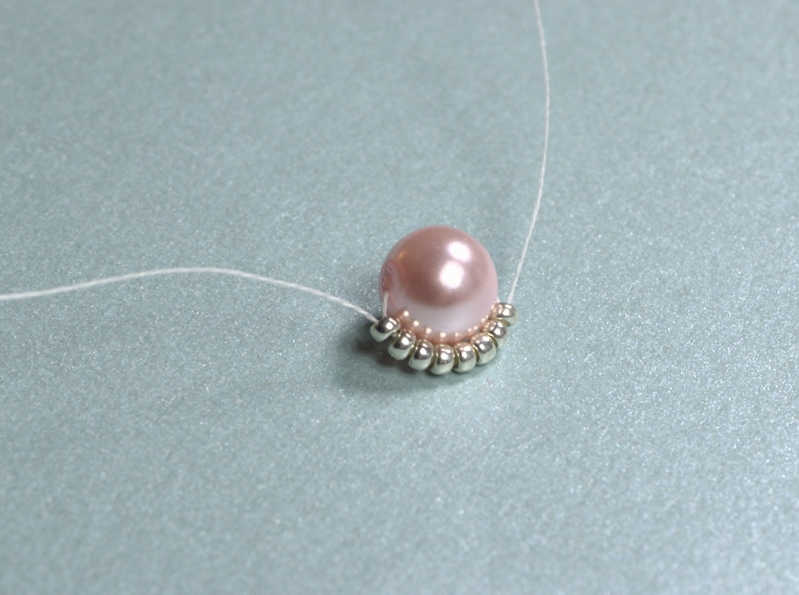
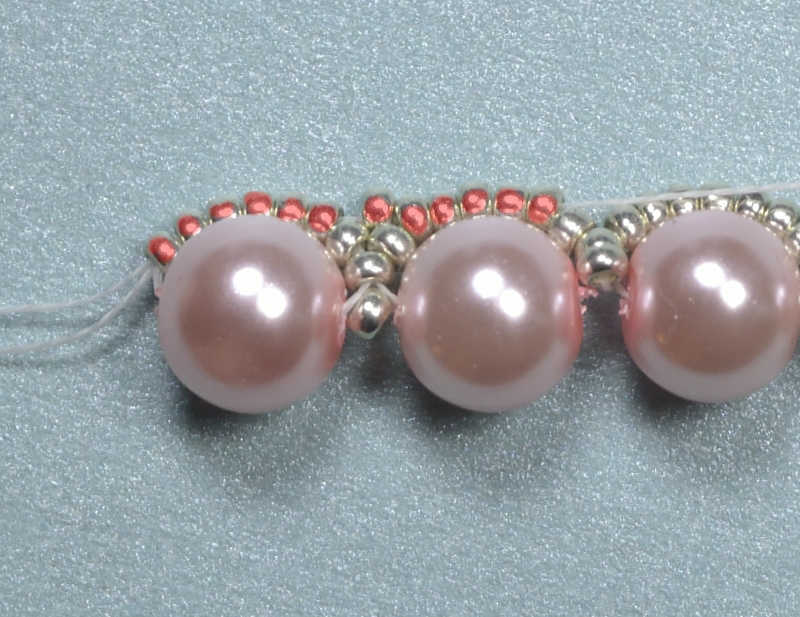
First you take 8 seedbeads and a big bead on a thread. Then you pass the thread through all the beads again. The seedbeads settle around the big one. You pass the thread twice through all of them with the first set. Now slip the thread through seedbeads only.
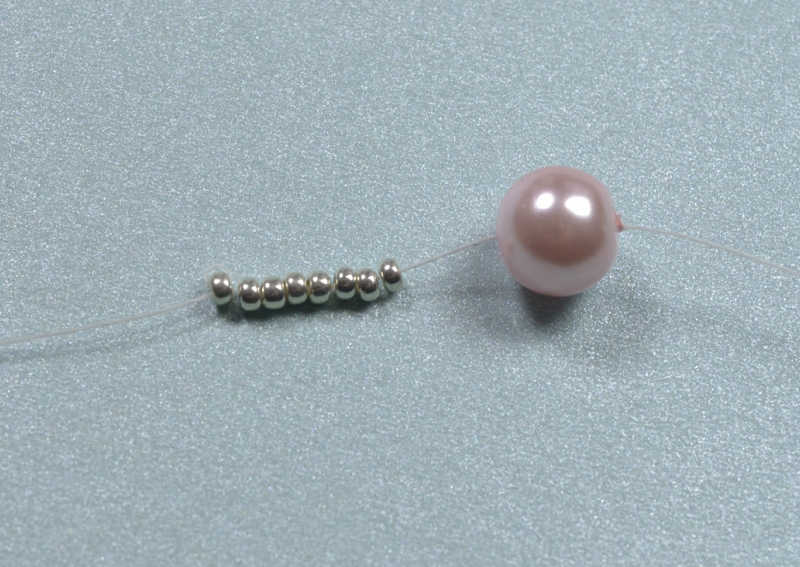
Picture 2: The beginning.
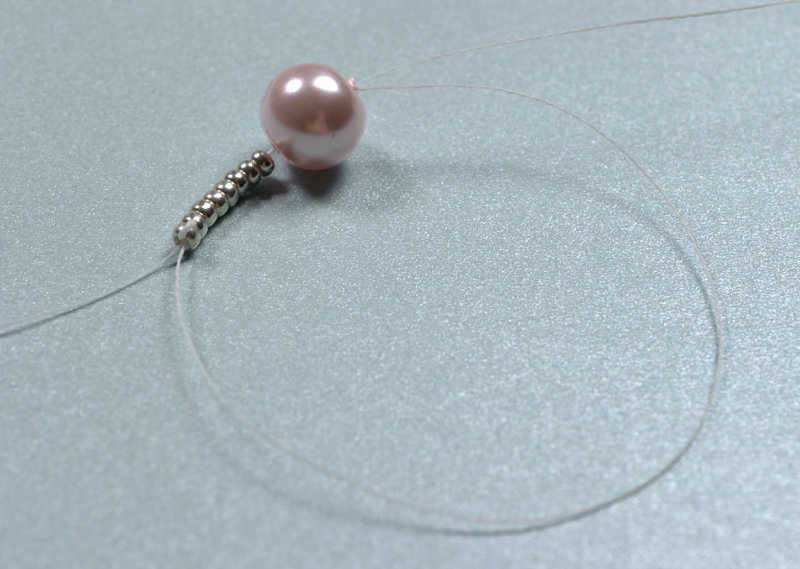
Picture 3: The thread goes through all the beads twice, then only through seedbeads.
Picture 4: The first set is ready.
The next step is to take one seedbead and make a loop back through 8th seedbead. Now there are 9 seedbeads around a big bead. The purpose of this 9th bead is to keep all seedbeads on the same side.
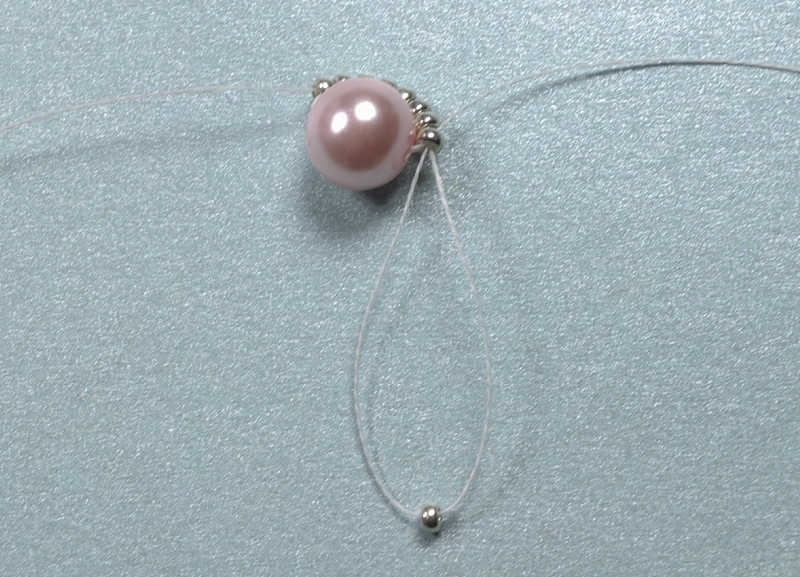
Picture 5: A thread loop and a seedbead go in between each set.
The second set is made almost like the first one: 8 seedbeads and a big bead. The thread goes through all the beads, then you make the loop. The only difference to first set is that the thread goes through the big bead only once.
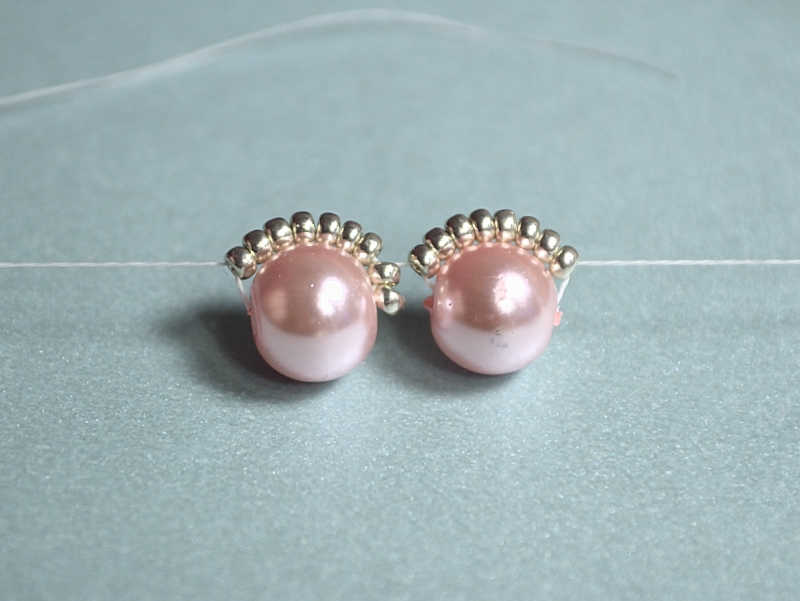
Picture 7: Second set is on place, only the loop and bead is not yet there.
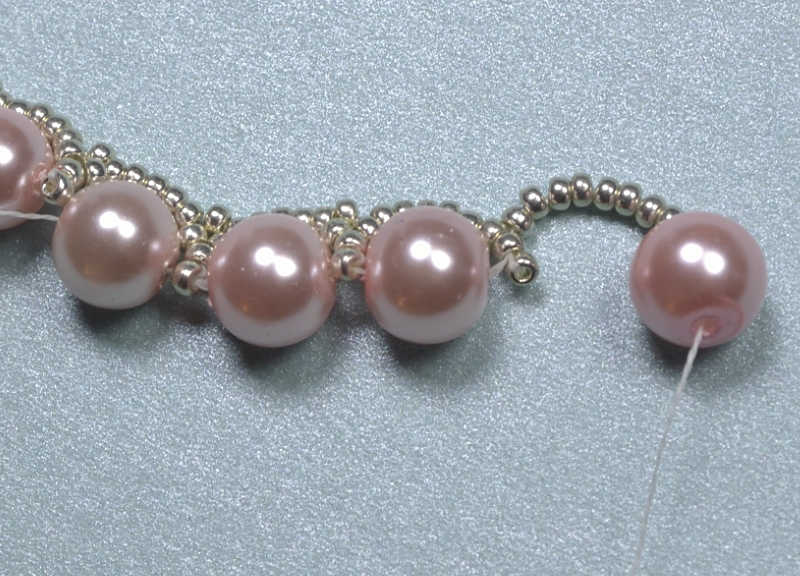
As your thread is coming to an end, take a new thread and start from very beginning. Go through first 6 beads, add one seedbead and after that always pick five beads on top of each big bead, add one, pick five again and so on. This new bead stabilizes the row and keeps the necklace in form.
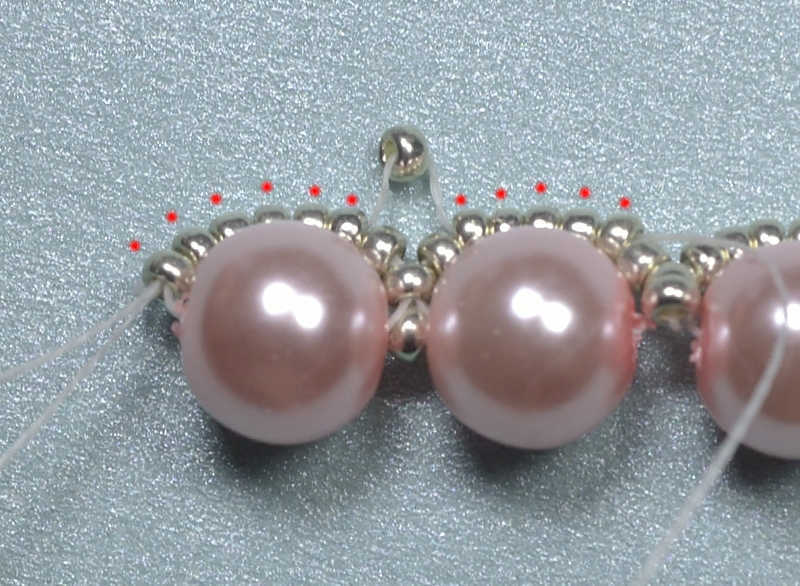
Picture 8: Stabilizing bead in the middle.
Picture 9: Tightened thread puts the stabilizer at its place.
When you reach the point where the new thread takes over, here’s what you’ll do:
To end the old thread: Take the thread inside a big bead and go through at least three of them. Make a doubleknot or two and cut the rest. In picture 10 you see that that old thread goes through big beads and comes out from a bead on the left.
To continue with the new thread: The new thread starts with loop, then 8 seedbeads and a big bead. The beading goes on the same way as before.
After your necklace has reached the desired length, bring one more thread through row of seedbeads, that is the 5 seedbeads and stabilizers. Add a stabilizer to spots that still miss one.
Picture 10: The old thread has been ended on the left. A new thread starts a new round.
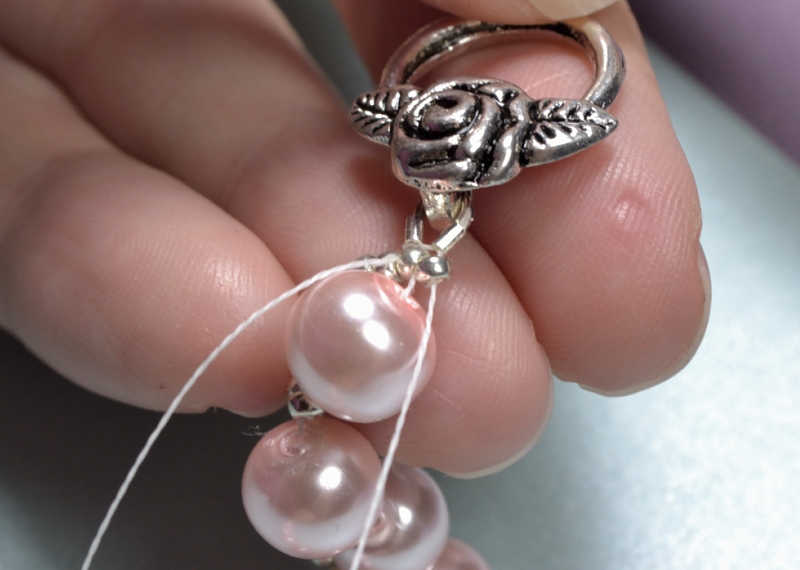
Then our necklace is finally long enough and all the beads are on place. It’s time to end the threads. I have added new threads so there are several loose threads on both sides. At this point you’ll need the horseshoes and a toggle clasp.

Picture 11.

Picture 12: You’ll need these for ending the necklace.
The thread goes twice through the horseshoe. I find this step the most difficult one. The waxed thread is slippery, parts slip away from each other sooner than you notice. It’s hard to make the two ends identical, other end has easily more thread hanging between the clasp and bead than the other.

Picture 13.
Picture 14.
When you have both ends covered, you’re done.
Aivan upean näköinen! :)