Part 1/2
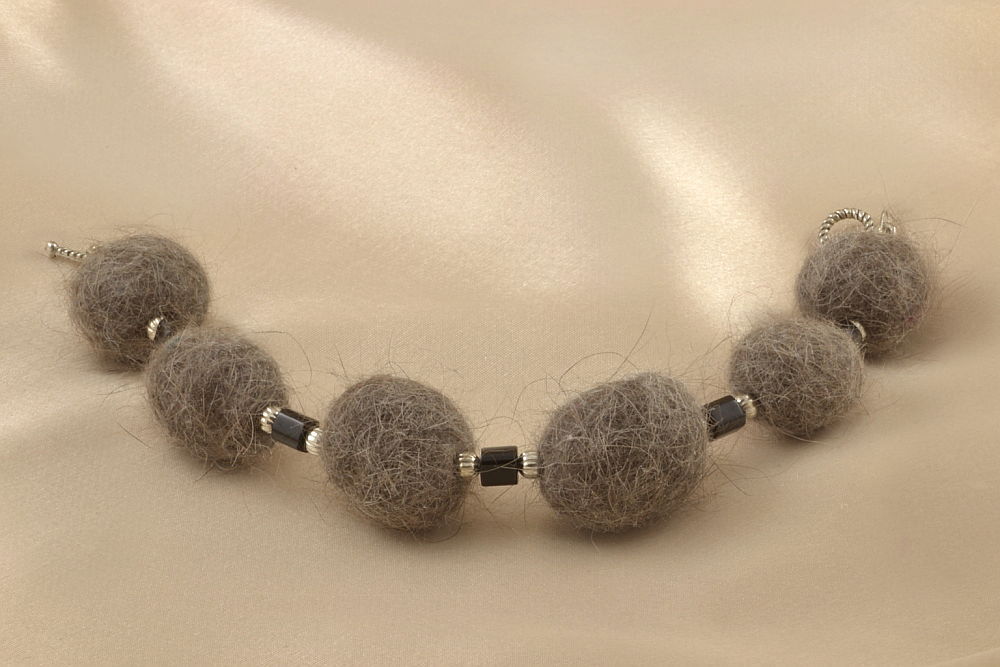
It seems that at least once a year we write an article that has something to do with photography. This is also our first photography article translated into English. Our aim is to tell you in a simple way what macro photography is, and what uses it has in jewelry photography. The one holding the camera is usually my husband, and he has more knowledge in this area, so he will be holding the pen this time. Focus Nordic has once again shown kindness towards our blog, and lend us the latest macro lens from Tamron for testing purposes.
Everyone who has ever held a camera in his/her hands must have noticed that there is a marco setting in Point and shoot -cameras and even on camera phones. This option provides ’macro-like’ results, and for many they are sufficient. Actual macro lens will bring the details even closer, and those who are true enthusiasts in this field have achieved amazing results. If you have ever seen an close up image of a bug, it is probably taken by using macro techniques.
What means macro photography?
The width of the image sensor on budget price DSLR is 24 mm (Nikon) or 22 mm (Canon). A common kit lens sold with these cameras has a 18-55 mm focus range. Its biggest reproduction ratio is about 1:3. Let’s imagine that you hold the camera on its side and take a picture of a tip of a pencil. You are using a Nikon body with 18-55 mm lens and you are focusing as close as possible. After you have taken the shot, view the image in 24 mm height. Do you notice anything? The tip on the image is only one third in size compared to a real pencil.
Mosts purists would argue that only lenses which have 1:1 reproduction ratio can be called real macro lenses. With those you can display your object in real size. Wait a minute – in REAL size? Those images of bugs look like horrific monsters! Lets take another picture but first we should change our lens to macro. Again, focus as close as you can and view the image in 24 mm height. How about now? The tip in the image is same size as a tip of a real pencil. The tip is displayed in real size.

Macro lens can take you so close to your small subject that it fills your camera’s sensor (and also your viewfinder) completely. Camera sensor holds amazing amount of pixels. If you print the image, say in 3000 px width, then it’s no wonder that the bug starts to look like a monster.
So what – one might think. I have so many pixels in my camera that I don’t need a macro. All I need to do is to crop my image, and the bug will show just fine! Partially true. You just need to have a really good camera and a hight quality lens. Otherwise your cropped image has just noise, color aberration and softness. The image size after heavy cropping is also small, and printing a bigger image is quite impossible.
Pitfalls of macro photography
One should learn the basics of macro photoraphy before jumping in to the world of macro. Otherwise you can become frustrated really quickly and start pulling your hair out. The images look soft, dark and even the lens doesn’t do what you want. What a crappy lens! Macro photography (at least in my opinion) is not for a hasty person. If you aim for great results you should check your ’Point and shoot -mentality’ at the door.
Depth of field
The depth of field describes the area that is in sharp focus in your image. When your subject gets closer and the reproduction ratio of your lens grows bigger, the depth of field decreases. Same law applies to all lenses. The only way to adjust this is to set your lens aperture as small as possible, but even then the area that is drawn in sharp focus is only a inch or so.
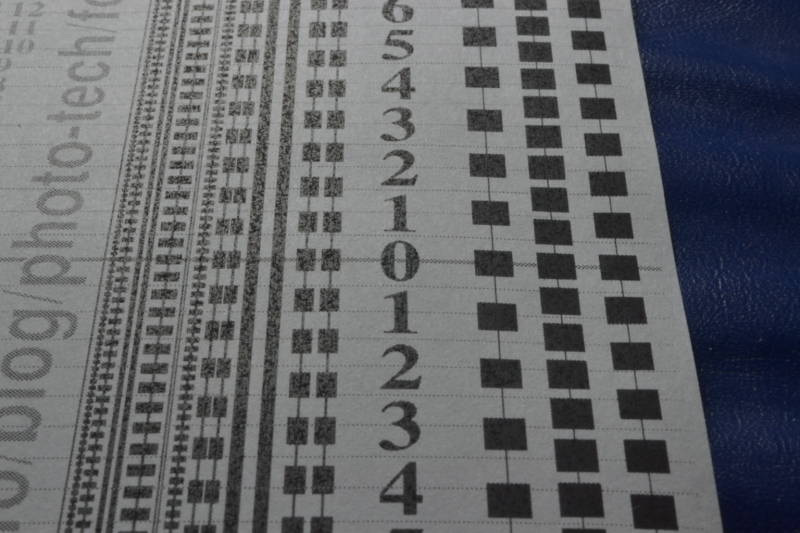
I’ll try to clarify this with examples. The following images are taken in a way where my camera is set on a tripod. The center of my lens is set on the same height as the zero, and the lens is focused to it. The test chart is in front of the camera, and it is leaning back in 45 degree angle. The black squares on the right are 0.118 x 0.118 inches (3×3 mm) in size.
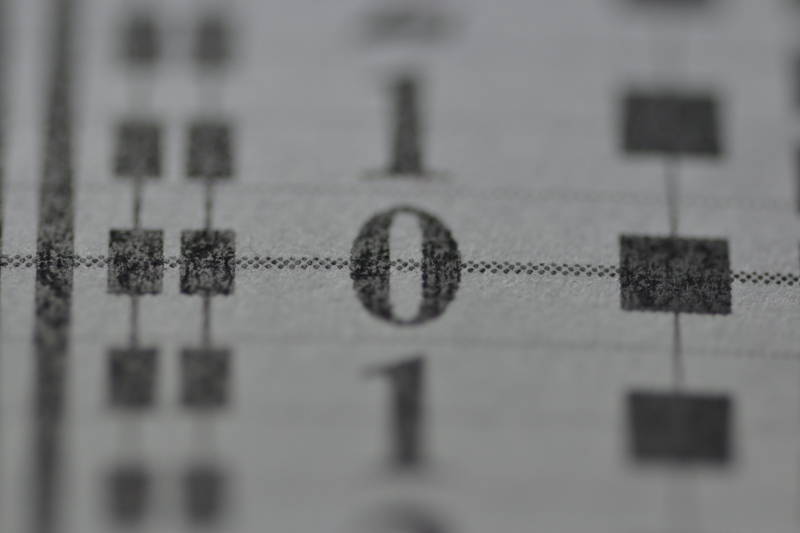
Macro, f/5.6
As you have learned, the lens that has a bigger reproduction ratio produces a shorter depth of field. There is really no point to use this big aperture with macro, but I did it for the sake of comparison. The area in sharp focus is only about 0.04 inches (less than 1 mm) behind and in front of the zero.
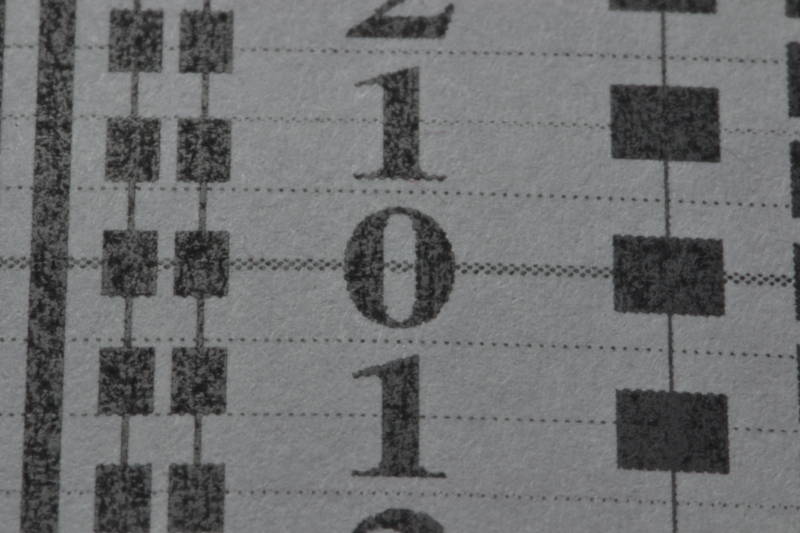
Common lens, f/5.6
A lens with smaller reproduction ratio shows the difference clearly. The area in focus has doubled to 0.08 inches (2.2 mm) on both sides.
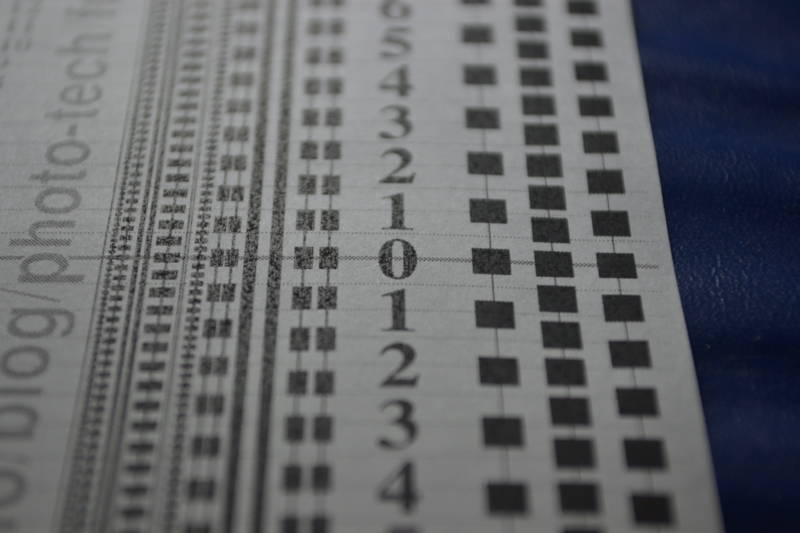
Macro, f/64
Lets make the aperture as small as possible. Changing the aperture to f/64 brings some improvement. Area in focus is around 0.4 inches (10 mm) on both sides.
Common lens, f/36
The smallest aperture on our 18-55 mm lens is f/36. The area in focus is already so large that it fills the image. The area in focus is about 0.6 inches (1.5 cm) on both sides.
Then how come macro lenses are not built in a way that the sharp area would be bigger? It’s not possible. The laws of physics will have their say in this matter.
Dark images
When you are starting out with macro photography you will soon notice that best results are achieved with small apertures. Then you’ll have another problem on your hands. The small aperture allows only a handful of light to be received by your camera’s image sensor, and your images are underexposed. You’ll need to use either longer shutter speed or increase the amount of light. When you are shootin live insects/other moving elements you can’t really use long shutter speeds. Your only option is to get more light. The good news is that you don’t need to buy expensive studio lights to achieve this. Using a ring flash will provide more than enough light for macro shooting indoors and outdoors. Even though this kind of flash is not enormously powerful, using it very close to your subject guarantees that you don’t ’lose light’. Other advantage of a flash is that it works as a shutter in this kind of shooting. A picture taken with small aperture and with short shutter speed would result as a black image. When the flash is lit only for a 1/1000 – 1/100 of a second, it will freeze your subject’s movement.
I know. This is a lot of information to take in. You may send me questions and I’ll try to answer. In part 2 I will discuss about one more pitfall and we will shoot some jewelry.
Shooting jewelry with macro lens part 2